Inquiry
Form loading...

10 Tips for Choosing the Right Laser Tube

Choosing the right Laser Tube is not a simple matter of matching wattage to a machine. It affects cutting speed, engraving depth, cooling stability, beam quality, and operating cost. A tube that looks powerful on paper may perform poorly in a humid workshop or under weak cooling control. Small details matter.

Theodore H. Maiman, the laser pioneer, once said, “The laser is a solution looking for a problem.” His observation remains useful when selecting a Laser Tube. The right tube should solve a defined production need, not simply increase power. This guide, “10 Tips for Choosing the Right Laser Tube,” examines practical factors, including rated power, working current, tube length, beam mode, cooling requirements, expected service life, and supplier support. These details become visible during real work: uneven engraving lines, overheating water, delayed ignition, or a beam that drifts after repeated use.

Experience also teaches caution. Advertised lifespan is not a guarantee. It depends on current settings, water temperature, duty cycle, alignment, and storage conditions. A lower-powered tube can sometimes deliver cleaner results and longer service. That sounds obvious, but it is often ignored.

There is no perfect choice. Operators must balance performance, compatibility, budget, and maintenance skill. Checking manufacturer data is essential. Independent testing is even better. When uncertain, measure twice. Then decide. This introduction provides a clear starting point for evaluating Laser Tube options with technical judgment, practical awareness, and a willingness to question attractive specifications.
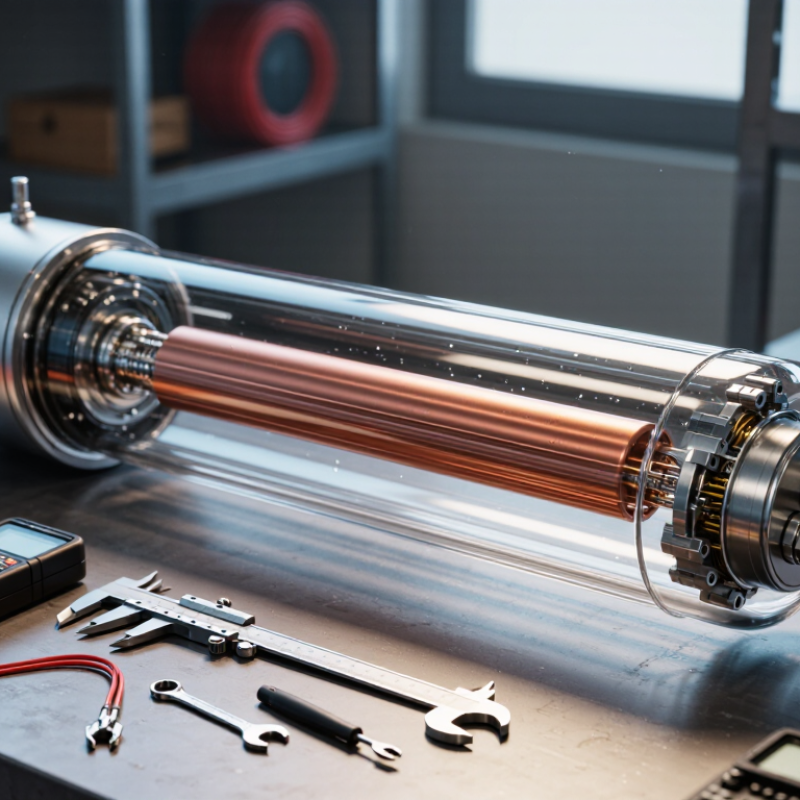
10 Tips for Choosing the Right Laser Tube

Identify the Laser Tube Type and Its Intended Application

Identify the laser tube type before comparing price or power. Most CO2 systems use sealed glass tubes with direct-current excitation. They suit wood, acrylic, paper, leather, and many coated materials. Their 10.6-micrometer wavelength works well with organic materials. It does not generally cut bare metal efficiently.

RF-excited CO2 tubes RF-excited CO2 tubes offer a finer beam and faster response. They are often selected for detailed engraving, small text, and frequent start-stop work. Glass tubes can provide strong cutting performance at a lower initial cost. However, they require stable water cooling, correct alignment, and careful current control. Do not judge a tube by wattage alone. A higher rating may create excessive heat or a larger spot.

Match the tube to the actual workload. A hobby user engraving plywood may need a different tube from a workshop cutting thick acrylic every day. Check material thickness, working area, duty cycle, cooling method, and replacement access. In practical testing, I have seen operators choose power for rare peak jobs and overlook daily engraving quality. That choice became expensive. Measure the smallest details you need. Also confirm the tube’s physical length and mounting space before ordering. I once treated those dimensions as minor. They were not. A reliable selection comes from comparing real materials, operating hours, and required edge quality, not from chasing the biggest number.
Match Power Output to Required Cutting or Engraving Performance

When selecting a laser tube, match its rated power to the job, not the machine’s maximum label. A thin plywood sign may cut cleanly at moderate power and steady speed. Thick acrylic or dense hardwood needs more energy, slower travel, or several passes. I test the actual material before approving a tube for production. Small samples reveal scorching, incomplete cuts, and uneven engraving. They also expose my assumptions. Not bad is not enough.

Rated wattage alone can mislead. Ask how output is measured, at what current, and under which cooling conditions. A tube that reaches its rating briefly may perform poorly during a long batch. Check the required cutting thickness, engraving speed, line density, and expected daily runtime. For engraving, excessive power can soften fine details and darken edges. For cutting, insufficient power leaves narrow bridges partly attached. I record speed, power percentage, pass count, and edge quality in a simple test sheet. This creates repeatable evidence instead of guesswork.

Cooling deserves equal attention. Water temperature, flow, and stable alignment affect usable output. A powerful tube is wasteful if the lens, mirrors, or airflow cannot support it. Choose a modest reserve for occasional thicker work without oversizing the system. Oversizing can raise cost, heat, and operating complexity. I still sometimes favor faster cutting and regret the lost detail. That trade-off should be measured on the finished part, not imagined from specifications.

10 Tips for Choosing the Right Laser Tube - Match Power Output to Required Cutting or Engraving Performance

Indicative guidance for sealed CO₂ laser tubes operating near 10.6 μm. Actual results depend on optics, focus, air assist, material composition, machine motion, and tube condition.
Tip Selection Dimension Practical Guidance Indicative Power or Performance Range What to Verify Before Purchase
1 Define the primary job Choose the tube around the work you perform most often: engraving, thin-sheet cutting, or thicker material cutting. Approximately 20–40 W is commonly used for light engraving and thin non-metallic materials; 60–100 W is more suitable for general cutting; 100 W and above is often selected for thicker or production-oriented work. List the material, maximum thickness, desired edge quality, and target pieces per hour.
2 Match power to material thickness Higher wattage generally allows faster cutting or thicker passes, but it does not automatically guarantee a better cut. For many common non-metallic materials, a 40–60 W tube is typically used for thin sheet work, while 80–100 W or more provides greater cutting headroom. Request tested cut samples using the exact material thickness and production speed required.
3 Separate engraving power from cutting power Engraving usually favors low power, short pulses, and controlled motion; cutting favors sustained power and multiple or slower passes. A tube rated around 60–80 W can support both engraving and cutting when the controller provides adjustable power and speed. Confirm minimum stable output, PWM compatibility, and whether low-power operation remains consistent.
4 Check rated power versus maximum power Use the recommended working power for normal operation rather than treating the maximum rating as a continuous target. Operate within the manufacturer’s specified current and power limits; continuous operation near the upper limit can shorten tube life. Obtain the rated current, maximum current, recommended operating current, and test conditions.
5 Consider cutting speed and production volume For repeated production, sufficient power can reduce cycle time and the number of passes, improving throughput. A moderate power increase may enable faster cutting, but the gain depends on material, acceleration, air assist, and optical alignment. Compare complete cycle time, including setup and repeated passes, rather than wattage alone.
6 Verify material compatibility A typical 10.6 μm CO₂ laser is well suited to materials such as acrylic, wood, paper, cardboard, leather, and some textiles; it is not a universal metal-cutting source. Power selection should be based on the actual material response, not thickness alone. PVC and unknown plastics should not be processed because hazardous chlorine-containing fumes may be produced. Check the material safety data, additives, coatings, flame behavior, and approved processing list.
7 Match tube power to the working area Larger beds and longer optical paths may require careful beam delivery and alignment; selecting a very high-power tube for a small machine can create unnecessary heat and control challenges. Compact machines often use lower-power tubes, while larger-format cutting systems commonly use approximately 80–150 W or more, depending on the application. Check physical tube length, mounting space, beam path, mirror size, lens rating, and machine power supply.
8 Evaluate cooling requirements CO₂ tubes require controlled cooling. Water that is too warm can reduce output stability and accelerate tube deterioration. Many systems are operated with cooling water around 18–22°C, subject to the tube manufacturer’s specification. Avoid freezing and rapid temperature changes. Confirm coolant flow, temperature monitoring, reservoir capacity, interlock requirements, and recommended chiller size.
9 Check optical and electrical compatibility The tube, high-voltage power supply, mirrors, focusing lens, controller, and wiring must be compatible as one system. Higher-power systems generally require appropriately rated optics and electrical components; undersized components can cause beam loss, overheating, or arcing. Verify tube voltage, operating current, power-supply capacity, connector configuration, mirror diameter, and lens focal length.
10 Allow practical power headroom Choose enough capacity to meet the required result without routinely operating at the tube’s maximum limit. A practical target is often to complete the required job at approximately 70–85% of the tube’s rated working capability, leaving room for material variation and gradual aging. Validate the choice with production samples, measured current, expected duty cycle, warranty terms, and replacement availability.

Check Tube Dimensions, Cooling Needs, and Installation Compatibility

Tip 1: Measure the tube before ordering. Check its overall length, diameter, electrode position, and mounting points. A few millimeters can prevent proper installation. Compare the measurement with the machine’s available space, not only the old tube’s label.

Tip 2: Treat cooling requirements as a design issue. Confirm the required water flow, temperature range, and hose size from the technical documentation. Use clean, suitable coolant and inspect the circulation path for leaks. In practice, a small kinked hose can raise tube temperature quickly. That mistake is easy to miss.

Tip 3: Check installation compatibility carefully. Verify the high-voltage connection, return path, tube polarity, and mounting direction before fitting the replacement. The tube should sit firmly without pressure on its glass body. Leave enough clearance around the cooling ports and wiring. Crowded installations often create avoidable service problems.

Experienced technicians usually photograph the original connections before removal. This simple record helps prevent reversed wiring and misplaced hoses. They also inspect brackets, mirrors, and airflow, because tube performance depends on the surrounding system. A technically correct tube may still perform poorly in an unsuitable machine.

Do not rely on appearance alone. Two tubes can look similar but require different cooling capacity or electrical settings. Review the machine manual and the tube’s certified specifications. If the dimensions seem right but the installation feels forced, stop and reassess. My own checks have shown that overlooked clearance is often the real issue.

Compare Lifespan, Beam Quality, and Manufacturer Reliability

Choosing a laser tube starts with more than its advertised power. In workshop use, lifespan depends on duty cycle, cooling quality, alignment, and maintenance. A tube rated for 8,000 hours may fail sooner under daily heat stress. Ask how the figure was tested. Was it measured until complete failure, or until output dropped? That distinction matters. Record operating hours and inspect cooling water for cloudiness or particles. Small details often reveal expensive problems early.

Beam quality needs practical testing, not only a specification sheet. Check the beam profile at the working distance used by your machine. A clean, stable spot creates sharper corners and more consistent cuts. Use test patterns with fine lines, circles, and small text. If edges become rough, the tube may be aging, misaligned, or poorly cooled. Check the setup first.

Manufacturer reliability includes traceable test data, clear warranty terms, and responsive technical support. Ask whether replacement measurements are documented before shipping. Reliable suppliers explain tolerances instead of promising perfect performance. I once trusted a low price and overlooked inconsistent documentation. That choice saved money initially, but caused repeated adjustments later. My judgment was not perfect. Compare service records, not just discounts, and keep written maintenance notes for future decisions.

Evaluate Safety Features, Warranty Coverage, and Total Operating Cost

Choosing a laser tube starts with safety, not maximum wattage. OSHA’s Technical Manual states that Class 4 lasers can cause immediate eye or skin injuries and may ignite combustible materials. Require a sealed beam path, reliable interlocks, emergency shutoff access, and clear warning labels. ANSI Z136.1-2022 also recommends controlled access, trained operators, and documented hazard assessments.

Tip 1: Ask for the tube’s laser classification, test records, and cooling requirements. A low-cost tube is not a bargain if unstable cooling shortens its life. Check coolant temperature, flow protection, and electrical insulation. Small oversights matter.

Warranty language deserves equal attention. Confirm coverage periods for the tube, power supply, optics, and labor. Ask whether shipping, diagnosis, or water damage is excluded. The U.S. Federal Trade Commission advises consumers to examine written warranty terms, exclusions, and repair responsibilities before purchase. Keep installation records and operating logs; they may support a claim.

Tip 2: Calculate total operating cost over three years. Include purchase price, electricity, coolant, filters, maintenance labor, downtime, and replacement tubes. The U.S. Department of Energy’s Operations & Maintenance Best Practices guide links preventive maintenance with improved reliability and reduced lifecycle costs. That principle applies here, although actual savings depend on workload and environment. Compare cost per productive hour, not price alone.

Tip 3: Request measured power consumption and expected service life under your duty cycle. Treat optimistic life estimates carefully. Real workshops are rarely perfect.